Tuesday, July 31, 2012

If You Only Knew Forum Set FTU


This tut was written for those with a basic knowledge of psp.
I am using the awesome artwork of Ismael Rac.

You need a license to use this art work. Please do not use without a license.
You can find his art at his store HERE

Supplies Needed
I used PSPX...but any of them should work.
Xero Filter-Porcelain and Mistifier
VM Extravaganza-Transmission
Mura Meister-Copies
Scrap called Hollywood Hottie
Update :-( (No Longer Available) 
by ChaneyJo, get it HERE
Font used Amperzand

Drop Shadow usually V2 H2 50 5

Let's get started

Open a new image 600 x250
Select your selection tool, then click the custom selection button at the top and have your settings as
Top and Left at 0 and Right at 300, Bottom at 250, copy paper #8 and then invert and delete. Copy paper #2, then click invert again, delete and select none.
Crop your tag.
Apply VM Extravaganza-Transmission on the right side paper with these settings
40, 0, 40
Paste your full tube and apply Mura Meister-Copies-Wallpaper Rotate and go to Adjust blur and guassian blur at 3.  Change the blend mode to soft light, add a drop shadow of V1 H1 100 9 Black, then change the V & H to minus and apply again, duplicate and change the opacity to 60%.
Take ribbon #1 and resize to 30% and paste and then rotate 90% left or right and place where the 2 papers meet.
Paste your full tube and mirror and move to the left side, apply Xero filter-porcelain and then mistifier twice.
Resize flower #2 to 75% and place to the left in front of your tube, duplicate and mirror.
 Adjust to where you like them.
Copy and paste your close up tube and move to the right side.
Crop your tag and select all, add a new raster layer and fill with black, contract by 4.
Resize the ribbon on the tassle layer to 55% and then take your free hand selection tool and draw around that and copy and paste as a new layer and resize again to 65%, now paste on your tag and place at top or bottom, duplicate and flip, then duplicate and free rotate 90% and place on one side or the other and then duplicate and mirror, merge these layers together.
Keep this ribbon for the Avator
Move below the black frame layer.
Being on the black frame layer, select all, contract by 7, new raster layer and fill with black, contract by 3, and delete.
Add your copyright to your tag now.
Once done with the Avator can add your name also.

Now for the Avator
Open a 150 x 150 new image, select all, new raster layer, fill with black, contract by 4, delete.
Paste your ribbon from before, move below the black frame layer, duplicate flip, duplicate and free rotate 90%, duplicate and mirror, once placed merge these layers into one.
Move below the black frame layer.
Being on the black frame layer, select all, contract by 7, new raster layer and fill with black, contract by 3, and delete.
Copy and paste your tag you made for the signature, move below all the frame work.
Resize to 70% and place where you like it and them merge visible and add your copyright to this and your initial or name and you are all done now.
Hope you have enjoyed doing this tut.

Monday, July 30, 2012

Black Widow FTU


This tut was written for those with a basic knowledge of psp.
I am using the awesome artwork of  Jamie Kidd.
You need a license to use this art work. Please do not use without a license.
You can find this art at CDO HERE
Supplies Needed
I used PSPX...but any of them should work.
Template Spider Web HERE
Scroll down a bit
Heza Scraps Blog HERE
Scrap called Horror Whorez HERE
EyeCandy 4000-Gradient Glow (optional)
Xero filter-Soft Mood and Mistifier
Font PR Celtic Narrow 
Drop Shadow usually V2 H2 50 black


Let's get started
Remember to add your drop shadow as you go along.

Open the template, duplicate and close the original.
I moved the gray squares to where I could merge them down into one layer. I did the same with the spider webs also.
On the gray squares, select all, float, defloat and paste paper #3, invert, but do not delete yet.
Copy your tube and place on one side or the other, delete, select none.
Duplicate your tube and mirror and do any adjusting, merge down and apply the xero filter-soft mood and then mistifier.
Move tubes below the spider web. Add a thin gradient glow to the spider web.
I moved the frame layers so I could merge them down also, then select, float, defloat and paste paper #4, invert and delete. Use this same paper on the black rectangles.
I added a medium gradient glow to the frame and rectangles.

Resize the black widow spider to 45% and free rotate to the right 20% add the thin gradient glow to this, then duplicate and mirror and place more to the top.
Resize the red gem to 15% and place on one corner, then duplicate, mirror, duplicate flip and duplicate mirror, do any adjusting.
Take your font now and type out what you want yours to say. I typed out Step into my Web a couple of times and then duplicated and move to the bottom rectangle.
Now add your tube and resize as needed.
I took my free hand tool and crop some of the tube so it would not be hanging over anywhere.
If happy, merge visible and resize your tag.
Add your copyright and name and you are done.

Now for the Avator
Open a new image 150 x 150 and copy and paste your merged image and resize to 70%.
I used one of the frames as the avator, but you can decide what you would like to use, then merge visible. Be sure to sharpen your tag and add your copyright and name or initial and you are done.
Hope you enjoyed doing this tut.


Summer Fun FTU


This tut was written for those with a basic knowledge of psp.
I am using the awesome artwork of Alex Prihodko.
You need a license to use this art work. Please do not use without a license.
 You can find this art at PFD HERE
Supplies Needed
I used PSPX...but any of them should work.
Scrap kit by TopCatTagz called Summer Fun HERE
Template Summer Fun HERE
EyeCandy 4000-Gradient Glow and Chrome (optional)
Filter Factory G-Blast 'Em
Font Shark in the Water 
Drop Shadow usually V2 H2 50 black


Let's get started
Remember to add your drop shadow as you go along.
Open the template, duplicate and close the original.
I went to Image and resized my canvas, 800 x 800, but resize to whatever you prefer.
Delete the credits.
On each layer of the template you will do select, float, defloat, invert and delete. Then delete that layer of the template.
We will work from the bottom up on the template.
Shape layer #7, I applied EyeCandy 4000, chrome and then took my change to target tool brush and colored it with a color from the tube.
Element #55 I resized larger to 120%.
Select shape 3 and paste paper of choice, I used #16.
Then resize element #8 to 30% and place on top of the paper layer, duplicate and mirror and erase a bit in the center.
On the Sun layer apply EyeCandy Gradient Glow with these settings
5.77, 25, 40
Then paste paper of choice, I used #8, and move below the sun layer, back on the sun, select all, float, defloat, expand by 10, invert and being on the paper layer, delete.
Apply Filter Factory G- Blast 'Em to the paper with these settings, twice
15, 255
On shape layers, shape 4 copy, 6, 4, 5, copy papers of choice.
I used papers 8, 7 and 10
Copy and paste your tube and resize if needed.
I mirrored my tube and then move below the word FUN, duplicate and bring to the top and erase part of the leg from the letter F and part of the U, to make it look like it is coming thru the U.
Resize element #22 to 75% and place behind the tube on the left.
Resize element #25 to 85% and place behind the tube layer.
Resize element #10 to 75% and place behind your tube layer just above the shape 6 layer
Resize element #44 and 45 to 55% and place by your tube on the left. Resize element #4 and #5 to 35% and place behind the drinks, duplicate and place where you like.
Resize element #33 to 30% and element #35 to 40% and  place.
Resize sunglasses to 55% and free rotate to the left 25% and place on the blanket.
Add any other elements that you would like. Give it your own personal touch.
On the wordart summer, add a medium gradient glow, color of choice and then drop shadow.
Merge visible and resize your tag now.
Add your copyright and name and you are done.
Hope you enjoyed doing this tut.


Thursday, July 26, 2012

Wishing you were here FTU


This tut was written for those with a basic knowledge of psp.
I am using the awesome artwork of Misticheskaya.
You need a license to use this art work. Please do not use without a license.
You can find this art at PFD HERE
Supplies Needed
I used PSPX...but any of them should work.
Scrap Norwegian Farm by Eileen Designs HERE
Xero Filter-Clarity
EyeCandy 4000-Gradient Glow (optional)
Redfield Filter-Ripple Magic & Perfectum (optional)
Can do a search for these filters.
WSL_Mask 84 HERE
Font Ton Tiki Enchanted  
Drop Shadow usually V2 H2 50 black


Let's get started
Remember to add your drop shadow as you go along.
Open a new image 800 x 800, I like room to work,
can resize later.
Paste paper #2 and add your mask, delete and merge group.
Resize element #19, frame to 65% and paste onto your new layer.
Paste element #39 behind frame, move to one side then duplicate and mirror and position on the other side. 
Take your magic wand, click inside, expand by 2, paste paper #2, invert and delete.
Do not deselect yet, copy your tube and position where just the flower part is showing, then delete and select none.
Apply the Redfield filter-Ripple Magic, dance floor at default setting to the flower first. Then apply the Redfield Filter-Perfectum at 95%.
Then duplicate and mirror and position in the other frame, you will have to erase a little from the top.
Resize element #28 to 50% and place toward the top of the frame, then duplicate and mirror.
Paste element #21 and move to the lower part of the frame,
then paste element #52 and resize larger to 110% and place
on top of element #21.
Resize element #34 to 65% and paste, you can reposition once you have your tube on there.
Resize element #76 to 40% and place on the right side, behind the lawn with the flowers on it.
Then resize element #14 to 50% and place on the left side behind the lawn.
Resize element #15 and place to the left by the bale of straw.
Resize element #36 to 25%, mirror and place on the left side by the straw bale. Resize element #48 the butterfly to 15%,
duplicate a couple of times and place where you like.
Rotate one or two, free rotate 25% to the right or left.
Resize element #65 the cat to 50% and place on the right.
Paste your tube now and resize if needed, play around with the elements now and put them where you like the looks of them, you can refer to my tag as to where I put all of them.
Resize element #12 the white daisy to 15% and duplicate a few times and place in different areas behind your tube layer.
Now write what you want on your tag,
I wrote Wishing you were here and applied EyeCandy 4000 glass, then selected all, float, defloat, expanded by 2, new raster layer and filled with a lighter color. Move below and add your drop shadow.
Once happy, merge visible, resize your tag and
Add your Copyright and name and you are done.
Hope you enjoyed doing this tut.


Monday, July 23, 2012

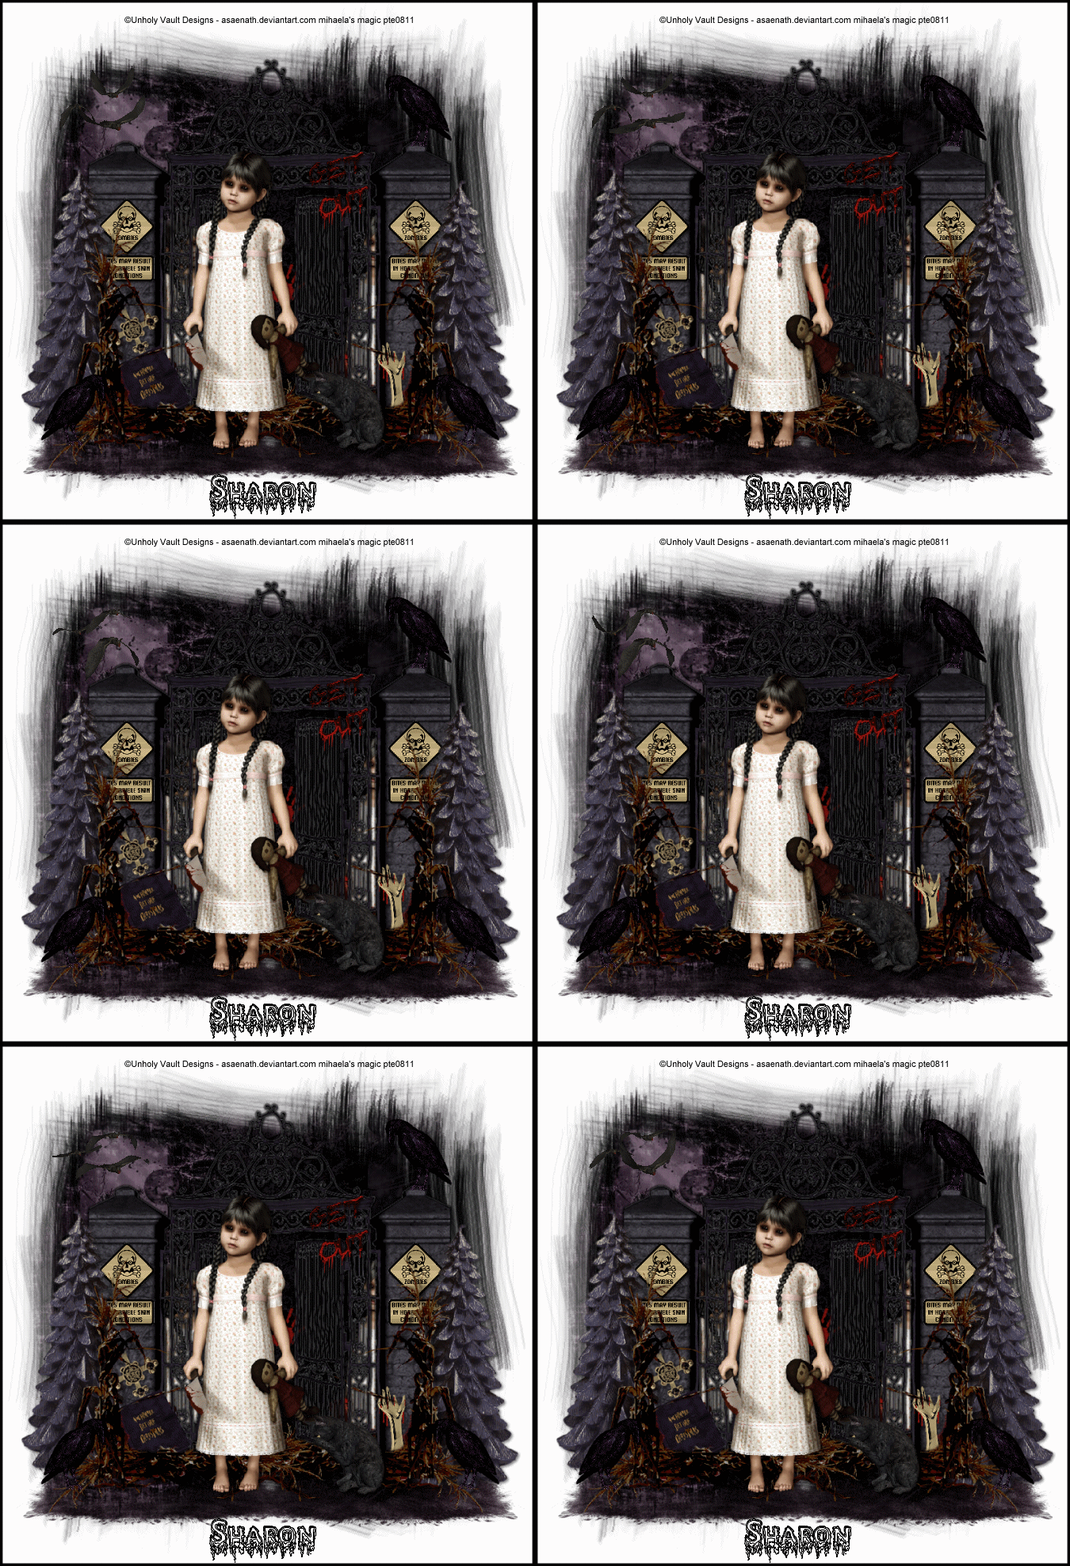
Zombie Night FTU


This tut was written for those with a basic knowledge of psp.
I am using the awesome artwork of Unholy Vault Designs.
You need a license to use this art work. Please do not use without a license.
You can find this art at PTE HERE
Supplies Needed
I used PSPX...but any of them should work.
Scrap kit Nightmare before Xmas by A Taggers Scrap HERE

EyeCandy4000-Gradient Glow (optional)
WSL_Mask117  HERE
Free animated bats HERE
Font is Black-Asylum
Drop Shadow usually V2 H2 50 5
Let's get started

Open a 800 by 800 new image
I like room to work..lol
Copy and paste paper #5 and apply your mask, delete and merge group.

Copy and paste the gateway.
Copy and resize the tree to 85% and place on each side of the gateway.
Copy and paste the dead cornstalkes and resize to 85%, move below the gateway, then duplicate and move to top and erase the blood spot on this one.
Then duplicate both and mirror and position on the other side.
Drop shadow -2 -7 on the one on the left then change the minus 7 to 7 for the one on the right.
I then added the EyeCandy4000, fat gradient glow, color black, 3, 25, 100 to the gateway and then used my soften tool on the white areas, then sharpened twice.

Resize the hand print to 30% and being on the wall layer, paste and rotate to the left 20%, then duplicate and mirror.
Resize the sign to 40% and place on either side or both sides of the gateway, behind the corn stalk and the tree,
 sharpen and add your drop shadow.
Add your tube and resize to 75% and place in front of the gateway.
I then duplicated it and moved behind the gate and to one side, erased the feet and then duplicated and moved to the other side like she is looking thru the slats. Change the blend mode to screen on both behind the gate.

Resize the book to 40% and rotate to the left 25% and place behind the corn stalk.
Place the cross above the book, free rotate 25%.
Resize the crow to 45% and place on the gateway, sharpen a couple of times, then duplicate and mirror and place by the corn stalk.
I took the lawn picture tube that comes with psp and added it about 3 times and then changed the color, Adjust,
Hue and Saturation, colorize both set to 0 and then added dsb flux, bright noise at 12 and darker checked, move below the gateway.
Resize the gold hand to 40% and place on the right, behind the corn stalk.
Resize the cat to 50% and mirror and move to the right some.
Resize the wordart to 40% and place to the left.
If happy with it all,
resize and add your copyright and named.
If you are going to animate continue if not you are done.
To Animate
Open animation shop, open your bat image, it has 8 frames.
Copy your merged image from psp to animation and make 8 frames.
You will click on the center paper that looks like a clip board.
Once you have 8 frames, click on your first frame of your bat layers, go to edit, select all, copy.
Then go to your tag and click edit, select all, paste into selected frame and place up by the moon from your mask layer.
Hope you have enjoyed doing this tut.


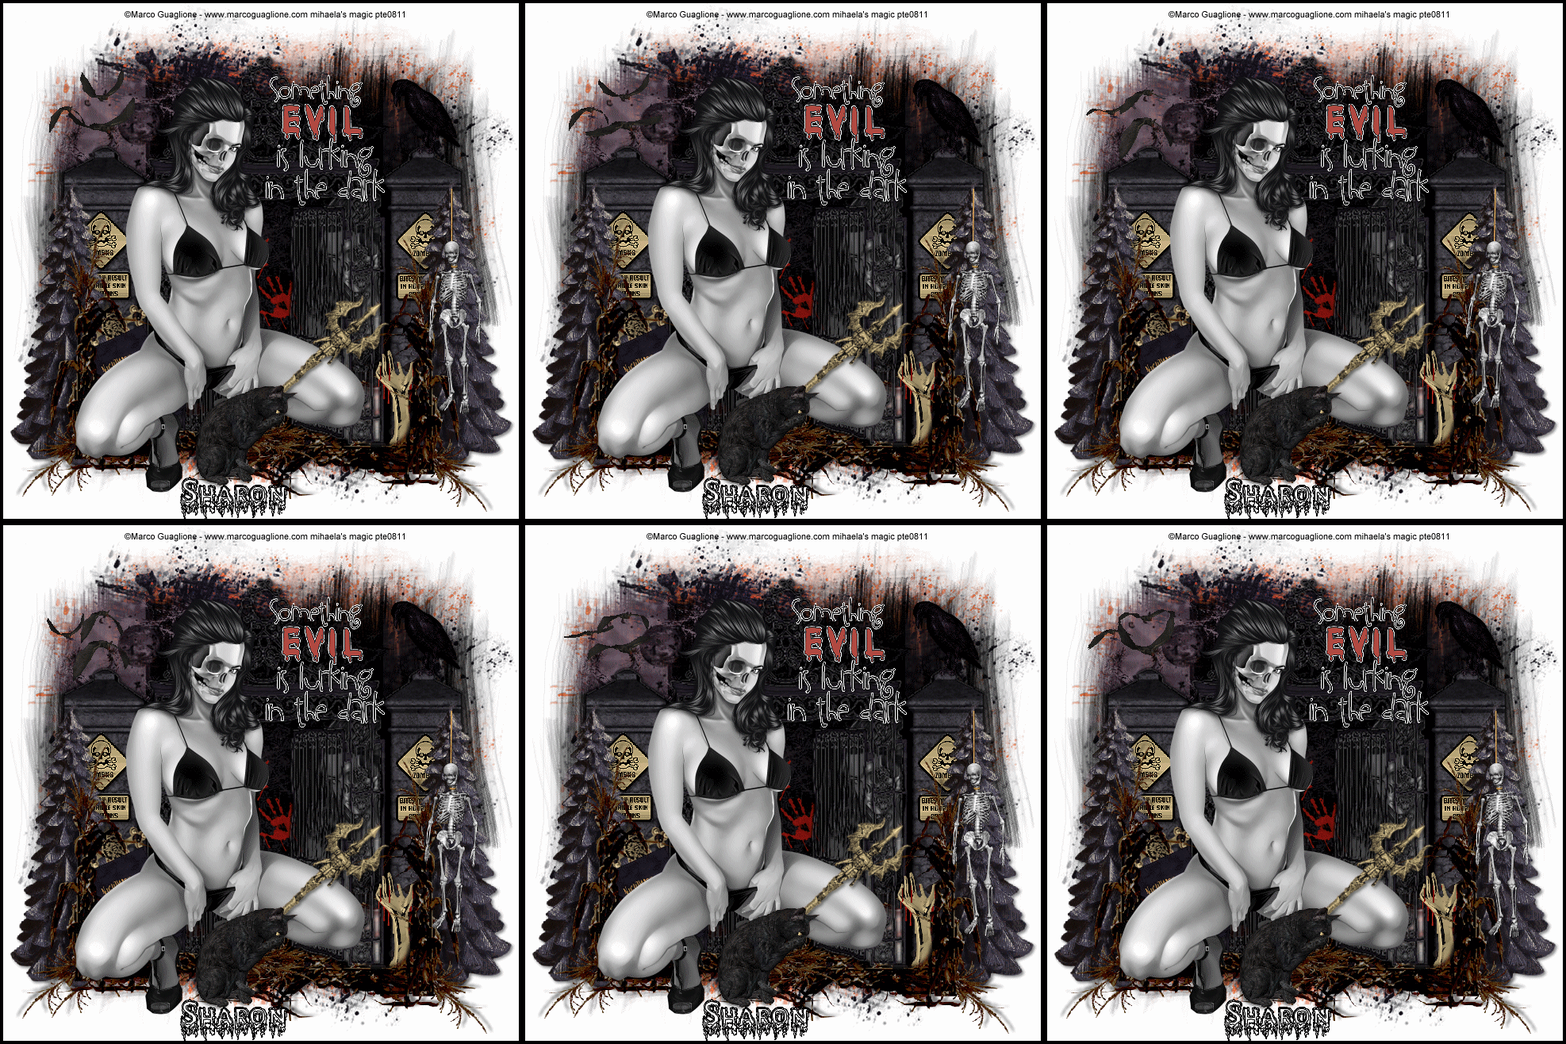
Showing off some tags that others did with my tut


Sunday, July 15, 2012

Daisy FTU

This tut was written for those with a basic knowledge of psp.
I am using the awesome artwork of Kiwifirestorm.
You need a license to use this art work. Please do not use without a license.
You can find her art at The PSP Project  HERE
Supplies Needed
I used PSPX...but any of them should work.
Scrap kit by Becky visit her blog HERE
Scrap kit is HERE
Mura Meister Filter-Copies
Xero Filter-Porcelain (optional)
WSL_Mask84  HERE
Font is Saginaw 
Drop Shadow usually V2 H2 50 5
Let's get started
Open a new image 800 x 800
I like room to work, can resize later.
This is an easy one.
Add your drop shadow as you go along on each one.
Open paper #1, apply your mask, delete and merge and then
copy onto your new image. You may want to resize some with your pick tool once your tag is all done.
Copy and paste the daisy and go to Mura Meister, copies and use Encircle and change the number to 20 and then ok.
Now you have a frame. Take your magic wand and click inside, expand by 5 and paste paper of choice, I used #7,
invert and delete and move below the frame.

Remember to add your drop shadow as you go.
If using the same tube, resize to 60%, place below the frame, then duplicate and move above and erase any excess over the frame.
Apply the xero filter-porcelain to both tubes, (optional).
Take your daisy swag and place under your tube, duplicate and mirror and position.
Take the leafy swirl and free rotate to the left 90% and place behind the daisy swag, duplicate and mirror and do
any adjustment to get them into place now.
Resize both butterflies to 85% and place where you like.
I recolored the purple butterfly, go to Adjust
Hue and Saturation, colorize with these settings
Hue 144  Saturation 128
Then duplicate both and resize again to 85% and place where
you want yours placed.
Then take the little purple flower and duplicate about 4 times and stick it in different parts of the daisy swag.
Click on the daisy swag on the left, duplicate and free rotate to the right, place on the left side of your frame, you might have to erase a small bit of your tube.
Then duplicate the swag and mirror, adjust to your liking.
Copy and paste the leafy swirl and place just above the mask layer and then duplicate and mirror.
I duplicated and resize the butterflies a few more times and placed them in different areas.
Take the pendant and erase a small bit of the loop and place to the left on the leafy swirl.
If happy with everything, close off your background if you used one, and merge visible.
Resize your tag now and add your copyright and name and that's it.
I added chrome to my name and recolored it with a gradient.
Hope you have enjoyed doing this tut.

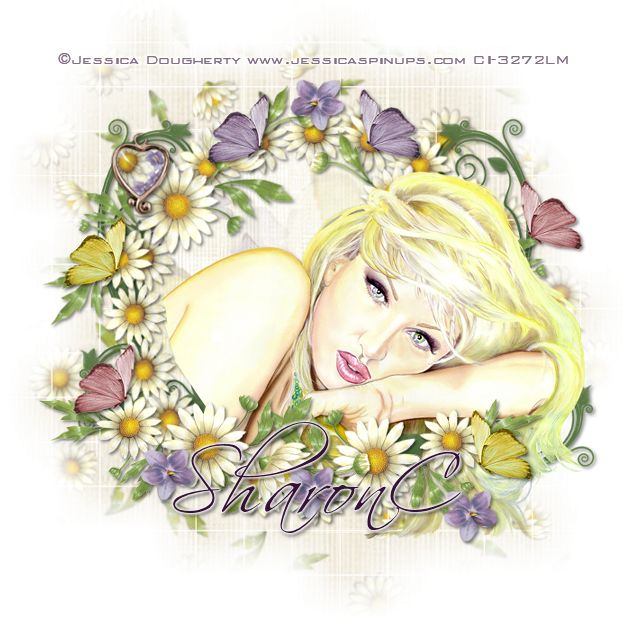
Showing off a couple of tags made by others doing my tut...
They did an awesome tag...
Daisysharon.png

GarveyVioletsteddie.png

Thursday, July 5, 2012

Let The Music Move You FTU

This tut was written for those with a basic knowledge of psp.
I am using the awesome artwork of Danny Lee.
You need a license to use this art work. Please do not use without a license.
You can find his art at his store HERE
Supplies Needed
I used PSPX...but any of them should work.
Tramages-Mo'Jellyfish
Xero Filter-Soft Mood
PhotoEffex-Scanlines
Filter FactoryA-Raygun at default settings
Eye Candy 4000-Bevel Boss, Chrome and Gradient Glow (Optional)
Template Sis_Tagger_Temp by Lori  HERE
WSL_Mask260 HERE
Animation by Missy, she has some zip with like 27 or so
I think the cd one is in one of them HERE
Font is Rufa 
Drop Shadow usually V2 H2 50 5

Let's get started
Open the template and duplicate and close the original, delete
the copyright.
Go to Image, Canvas size and change it to 700 x  700
I like room to work, can resize later.
Add your drop shadow as you go along on each one.
New raster layer and fill with #971b55 and apply your mask, delete and merge group.
Delete each layer of the template when done with that layer.
I moved the top bar layer down one and merged down with the bottom bar layer.
Now select all, float, defloat, add a new raster layer, fill with black, deselect. Add the PhotoEffex filter-Scanlines with
width at 2 and change the noise amount to 100%,
then ok. Go to Adjust and sharpness and sharpen twice.
Merge your right square down with the left square,
select all, float, defloat, new raster layer, fill with
#971b55 or color from your tube if using a different one.
Add the filter Tramage-Mo'Jellyfish, with these settings
150, 255, 132, then deselect.
Select the left/right bars, select all etc, new raster layer fill with #4c243a, add the filter, penta.com-Dots and crosses,
change the amount to 15, all else at default, then sharpen twice.
On the frame player mat and the menu mat, select etc, new raster layer and fill with black. I also added a bevel effect,
EyeCandy 4000 Bevel Boss, with these settings
5.76, 50, 75 or you can use the inner bevel that comes with psp.
Merge your bottom right frame down with the top left frame.
Select all, etc, new layer and fill with black, add your tube and then invert and delete, change the blend mode to Luminance (L). Add the xero filter-soft mood.
Duplicate this tube, mirror, place in the other frame at the bottom right.
Select the player layer now, select etc, new layer, fill with
#ab6c8b, add Filter Factory A-Raygun and then go to
Adjust, Hue and Saturation, colorize
Hue 223 and Saturation 26.
Add your tube and if using the same one, resize to 80%
and position, refer to my tag.
Merge the bottom note, Top note 1 and Top note 2 into one layer, apply EyeCandy 4000, Chrome, then change to target color with this #971b55. Then add a medium black gradient to
all the musical notes.
Merge the wordart Lets The and Music and then select all, float, defloat, add a new layer, fill with black.
Add the PhotoEffex filter-Scanlines with the vertical checked,
then sharpen twice. On the wordart, move you, apply a fat gradient glow with black.
If happy with everything, resize your tag with all layers checked.
Add your copyright and name. If you are not going to animate
then you can close off your white background and merge visible and you are done.

Now the Animation part,
I will try to explain it best I can, this is not my strong area of explaining sometimes. LOL
You will probably have to search thru her animations to find this one...She has some that have several zipped together.
So bare with me and hope I do not confuse you.
You are going to merge the tag into 2 different parts.
If you have deleted the template layers as you went along,
then close off all the layers below the tube, then merge
the tube and all layers above.
Now close this merged layer and open the others and merge
them all visible now.
Take the merge layer without the tube to animation shop,
if using the same animation as I am then make 16 layers,
then I used the one called cd by Missy and then went to edit, select all, resize down to 40% first.
Then edit, select all, copy and then go to your image and edit, select all, paste into selected frame and place on the black mat of the player more to the right, since the tube
will cover some of it..
Now go back to psp and copy and paste your tube layer into animation and make 16 layers.
Then edit, copy all, on the other layer, edit, select all, paste into selected frame and line your tube layer up.
Be sure the leg part is on the bottom strip of the tag.
Now save and you are done.
Hope you have enjoyed doing my tut.


Wednesday, July 4, 2012

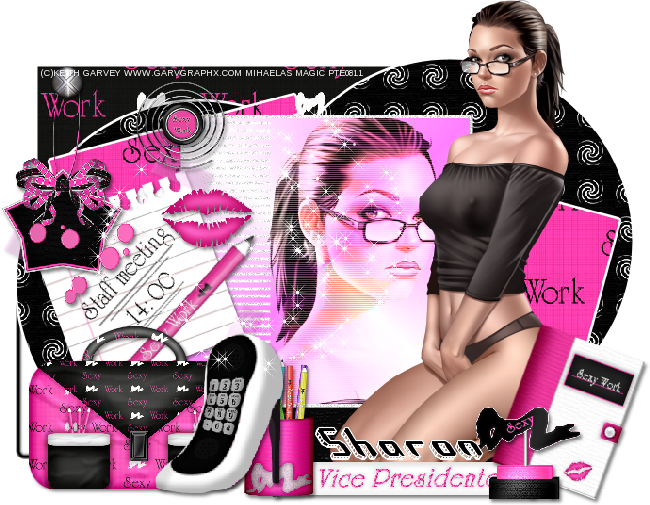
Sexy Work FTU


This tut was written for those with a basic knowledge of psp.
I am using the awesome artwork of Arthur Crowe.
You need a license to use this art work. Please do not use without a license.
You can find his art at his store HERE
Supplies Needed
I used PSPX...but any of them should work.
Xero Filter-Porcelain
PhotoEffex-Scanlines
Eye Candy 4000-Gradient Glow (Optional)
Scrap kit Sexy Work by Roses Black 
and you can get it HERE
Template 401 by Missy HERE
Font is Respective 
Drop Shadow usually V2 H2 50 5

Let's get started
Open the template and duplicate and close the orginial.
Go to Image, Canvas size and change it to 800 x 800
I like room to work, can resize later.
Delete the copyright and wordart from the template.
Open the deco 17 and resize to 120 and paste just above the white background layer.
Select the bottom light pink rectangle layer, select all, float, defloat and resize paper #2 to 75% and paste, invert and delete. As you go along delete the temp layer each time also.
Select the dark pink rectangle now, resize paper #1 to 75%, paste, invert and delete.
On circle one, click with your magic wand, paste paper #12, will have to move it over to the right a bit,
 invert, delete. Do the same with circle two.
Take copy of square one and merge down with the other square one. Then select all, etc and resize paper #3 to 75% and paste, invert and delete.
I have added the EyeCandy 4000 gradient glow to each layer,
with the settings at 3, 25, 100, fat setting with the first color being black and the second color being the pink.
I love using the gradient glow, but this is optional, if you prefer not to that is fine...I also still add my drop shadow to it to.
On the square 2 back add noise at 50%.
Take your magic wand and click in square 2 layer, new raster layer and fill with a gradient, using a pink for the forground and the white as the background, angle 45, repeat 4.
Delete the black rectangle.
Select all again, float, defloat, add your tube and invert and delete, making sure you are on your tube layer now.
Change the blend mode to hard light or one you prefer.
Then add the PhotoEffex-Scanlines at 2 width, noise amount at 50% and the verticle toggle checked.
If using the same tube, resize the full tube to 75% and place on the left side.
I took my free hand selection and drew a line across the rectangle, and deleted the part of the tube I did not want.
Add the xero filter-porcelain to it now.
Now select the rectangle, paste paper #7, invert, delete.
Elements now
Rb note, resize to 50%, free rotate, 20% to the left.
Attache'case, resize to 50%, Deco 13, resize to 75%, place on the left side.
Vice presidente, resize to 70%.
 Organizer resize to 40%, free rotate to the right, 20% and place on the right side of the tag.
Resize the porte nom bureau to 40% and place on right side
above the organizer.
The pot de crayon, resize to 40% and place behind the deco 13.
Take deco 23 and place just above the white background, duplicate and mirror, merge down and add noise at 50%.
Add sparkle one just above this layer and duplicate and mirror, merge down. Duplicate this layer and flip and move
so some show below the tag also.
Take deco 21, resize to 40% and place on the upper left of your tag. Deco 6, resize to 50% and place on top of deco 21.
Copy and paste sparkle #3 and move to the left a bit.
Resize the lips to 50% and place by the staff
meeting note.
Deco 15, resize to 40% and place to the left on top of the meeting note. Deco 14, resize, 50% and place at top right of meeting note.
If happy with everything then close off the white background and merge visible.
Resize and add your copyright and name and you are all done.
Hope you have enjoyed doing my tut.
Thanks for giving it a try.
 
Showing off what others did with my tut