Showing posts with label TonyTzanoukakis. Show all posts

Wednesday, January 4, 2017

Ice Queen


This tut was written for those with a basic knowledge of psp.
I am using the awesome artwork of  Tony Tzanoukakis.
You need a license to use this art work. Please do not use without a license.
The tube I am using is called Ice Queen.
 You can find this art at his store  HERE

Supplies Needed
I used PSPX...but any of them should work.
PTU Scrap Ice Queen by Irish Princess Designs  HERE
You can also find this kit at one of these stores here, here, here 
 DD Mask NWM 2  HERE
Check out the rest of the blog HERE

Font of Choice, I used Casablanca Noir

Drop shadow is usually V-2 H-2 Black, 50, 5, use what you prefer.
Let's get started
*Remember to add your drop shadow as you go along*

Open a new image 800 x 800 or one you prefer, paste paper 6, apply your mask, delete, merge group.
Resize your tube to 35%, if using the same one, paste.

Resize element 80 to 50%, paste below the tube on the left like she is sitting on it, duplicate, mirror, adjust.
Erase the straight edge part of the tube at the bottom.

Paste element 27 below the frozen ice cubes.
Resize element 5, paste below the frozen grass on the left, duplicate, move to the right side.

Paste element 25 on the mask layer.

Resize element 24 to 75%, paste on the left and down some, duplicate, mirror, move up a bit.
Paste element 76 on the castle, add your drop shadow so you can see the parts off the castle, erase those parts.
Paste element 83 at the top below the castle layer.
Paste element 37 on the right on the mask layer, move out some, erasing the bottom shadow part at the edge, duplicate, mirror.

Paste element 15 on the bottom of the tube layer
Resize element 98 tp 30%, duplicate 3 times, mirror one and arrange how you like at the bottom of the tube layer.
Duplicate one of the flowers, move to the right and below the greenery.

Resize element 74 to 20%, paste on the left at the bottom, duplicate, resize this one to 90%, move over a bit.
Resize element 9 to 20%, place where you like at the bottom.
Resize element 81 to 30%, duplicate a couple of times, place how you like at the bottom.

Resize element 23 to 30%, paste below the crown at the bottom.
Resize element 80 to 20%, paste below the rabbit layer, duplicate, mirror.

Paste element 59 on the top layer, adjust.

Resize element 39 to 95%, paste just above the tube layer at the bottom, duplicate, mirror, erase any part you don't want showing.

Resize element 73 to 30%, paste above the tube layer on one side, duplicate, mirror, adjust.

Add any other elements you would like.

Crop your tag to be sure no stray shadows are on the edges of your tag.
Once happy with it all, close off any backgrounds, merge visible.
Resize first, then add your copyrights and name.

That's it
Hope you enjoyed doing my tut.

Sunday, February 8, 2015

TonyTz COMING Soon The Key

These tags were made with the awesome tube
The Key 
COMING SOON from Tony Tz
I used matching kit by Kizzed By Kelz
You can find them soon in TonyTz's Store HERE


Thursday, January 29, 2015

All My Heart PTU

 photo allmyhearttt_zpsf1f138be.png
 
This tut was written for those with a basic knowledge of psp.
I am using the awesome artwork of  Tony Tzanoukakis.
You need a license to use this art work. Please do not use without a license.
 You can find this art at the his  Store  HERE
Supplies Needed
I used PSPX...but any of them should work.
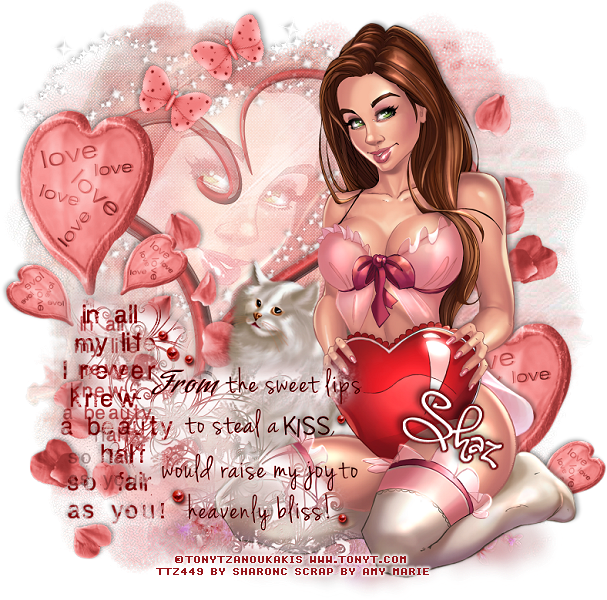
Scrap All My Heart by Amy Marie
and you can purchase it at her Store  HERE
RR Set Mask_2-1  HERE
Xero Filter-Mistifier and Soft Vignette
Font of Choice, I used One Starry Night

(Drop shadow for this tag was V-2 H-3 Black, 30, 7)
 
Let's get started
*Remember to add your drop shadow as you go along*

Open a new image 800 x 800

Paste paper 21, apply your mask, delete and merge group.

Select your mask, float, defloat, paste your tube, invert, delete, select none.
Change the blend mode to Screen, apply the Xero Filter-Mistifier,  change the haziness to 145, then apply
Soft Vignette, change the pattern type to Diagonal dots and repeats 1.
then merge down with your mask.

Paste your tube and resize to 45% and place more to the right.

Paste element 41 on the left side, overlapping your tube.
Paste element 32 below your tube layer and move over to the left some.

Paste element 53, mirror, resize to 75%, having it below your tube layer.
Paste element 45 under your tube layer and move toward the right a bit.

Resize element 49 to 70%, place on the left side below the wordart, duplicate, move down and over to the right behind your tube.

Paste element 36 below the heart layer on the left at the top.

Resize element 42 to 75%, place behind your tube and up some, duplicate, mirror, move below the wordart layer and place by the heart, duplicate again and move down more.

Resize element 30 to 20%, free rotate to the right at 30, place at the top, duplicate mirror and move back over to the left.

Add any other elements you would like.
Crop your tag to be sure no stray shadows are on the edges of your tag.
Once happy with it all, close off any backgrounds, merge visible.
Resize first, then add your copyrights and name.
That's it
Hope you enjoyed doing my tut.

I Love You 2 PTU


This tut was written for those with a basic knowledge of psp.
I am using the awesome artwork of  Tony Tzanoukakis.
You need a license to use this art work. Please do not use without a license.
 You can find this art at the his  Store  HERE
Supplies Needed
I used PSPX...but any of them should work.
Scrap Antoinne by Amy Marie
and you can purchase it at her Store  HERE
RR Set Mask_2-1  HERE
Xero Filter-Soft Mood
Font of Choice, I used Fiolex Girls

Drop shadow is usually V-2 H-2 Black, 50, 7
 
Let's get started
*Remember to add your drop shadow as you go along*

Open a new image 800 x 800

Paste paper 16, apply your mask, delete and merge group.

Paste frame 42, resize to 85%,  duplicate, change the blend mode to hard light, merge down.
Click inside with your magic wand, expand by 5, paste paper of choice, I used paper 19, invert, delete, select none.

Resize element 29 to 50%, place on the place layer and change the blend mode to Luminance (L) and move to the right a bit.

Paste element 16 on the frame at the bottom.

Paste your tube on top of the frame layer, resize to 85% and place how you prefer.

Paste your original tube below the heart layer, adjust how you like, lower the opacity to 30, then apply the Xero Filter-Soft Mood

Paste element 60 on the left side of the tube on top, resize it to 55%, mirror and move back by the shoes.
Paste element 27 below the sparkle layer.
Resize element 9 to 50%, place off to the right of the candy box.

Paste element 50 on your mask layer on the right, duplicate, mirror, flip and adjust both to your liking.
Paste element 39 on the mask layer in the upper left side, duplicate, flip and move over to the right side bottom.

Resize element 26 to 80%, place on the right side just above the frame layer, duplicate and mirror and move this one up just a bit more.

Place sparkle element 72 on the heart in the frame, place how you like and then erase the part outside the heart area.
Resize element 52 to 40%, place on the right side below the sparkle layer.
Paste element 62 below the paper layer of the frame and move up and how you like, then erase any part you don't want, duplicate a couple of times, flip, position, erase some, duplicate again, flip and adjust.

Then I pasted element 66, free rotate to the right at 90, placed above the heart trellis on the right and adjusted how I liked, erased some, duplicate, mirror, adjusted and erase a little more.

Add any other elements you would like.
Crop your tag to be sure no stray shadows are on the edges of your tag.
Once happy with it all, close off any backgrounds, merge visible.
Resize first, then add your copyrights and name.
That's it
Hope you enjoyed doing my tut.