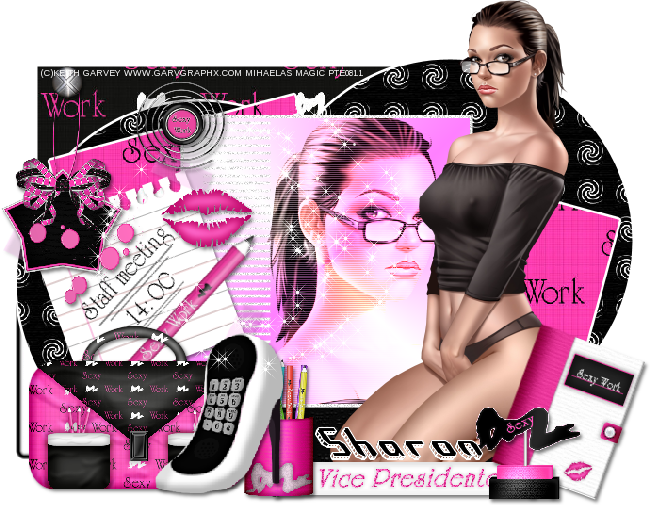
This tut was written for those with a basic knowledge of psp.
I am using the awesome artwork of Arthur Crowe.
You need a license to use this art work. Please do not use without a license.
You can find his art at his store HERE
Supplies Needed
I used PSPX...but any of them should work.
Xero Filter-Porcelain
PhotoEffex-Scanlines
Eye Candy 4000-Gradient Glow (Optional)
Scrap kit Sexy Work by Roses Black
and you can get it HERE
Template 401 by Missy HERE
Font is Respective
Drop Shadow usually V2 H2 50 5
Let's get started
Open the template and duplicate and close the orginial.
Go to Image, Canvas size and change it to 800 x 800
I like room to work, can resize later.
Delete the copyright and wordart from the template.
Open the deco 17 and resize to 120 and paste just above the white background layer.
Select the bottom light pink rectangle layer, select all, float, defloat and resize paper #2 to 75% and paste, invert and delete. As you go along delete the temp layer each time also.
Select the dark pink rectangle now, resize paper #1 to 75%, paste, invert and delete.
On circle one, click with your magic wand, paste paper #12, will have to move it over to the right a bit,
invert, delete. Do the same with circle two.
Take copy of square one and merge down with the other square one. Then select all, etc and resize paper #3 to 75% and paste, invert and delete.
I have added the EyeCandy 4000 gradient glow to each layer,
with the settings at 3, 25, 100, fat setting with the first color being black and the second color being the pink.
I love using the gradient glow, but this is optional, if you prefer not to that is fine...I also still add my drop shadow to it to.
On the square 2 back add noise at 50%.
Take your magic wand and click in square 2 layer, new raster layer and fill with a gradient, using a pink for the forground and the white as the background, angle 45, repeat 4.
Delete the black rectangle.
Select all again, float, defloat, add your tube and invert and delete, making sure you are on your tube layer now.
Change the blend mode to hard light or one you prefer.
Then add the PhotoEffex-Scanlines at 2 width, noise amount at 50% and the verticle toggle checked.
If using the same tube, resize the full tube to 75% and place on the left side.
I took my free hand selection and drew a line across the rectangle, and deleted the part of the tube I did not want.
Add the xero filter-porcelain to it now.
Now select the rectangle, paste paper #7, invert, delete.
Elements now
Rb note, resize to 50%, free rotate, 20% to the left.
Attache'case, resize to 50%, Deco 13, resize to 75%, place on the left side.
Vice presidente, resize to 70%.
Organizer resize to 40%, free rotate to the right, 20% and place on the right side of the tag.
Resize the porte nom bureau to 40% and place on right side
above the organizer.
The pot de crayon, resize to 40% and place behind the deco 13.
Take deco 23 and place just above the white background, duplicate and mirror, merge down and add noise at 50%.
Add sparkle one just above this layer and duplicate and mirror, merge down. Duplicate this layer and flip and move
so some show below the tag also.
Take deco 21, resize to 40% and place on the upper left of your tag. Deco 6, resize to 50% and place on top of deco 21.
Copy and paste sparkle #3 and move to the left a bit.
Resize the lips to 50% and place by the staff
meeting note.
Deco 15, resize to 40% and place to the left on top of the meeting note. Deco 14, resize, 50% and place at top right of meeting note.
If happy with everything then close off the white background and merge visible.
Resize and add your copyright and name and you are all done.
Hope you have enjoyed doing my tut.
Thanks for giving it a try.

Showing off what others did with my tut