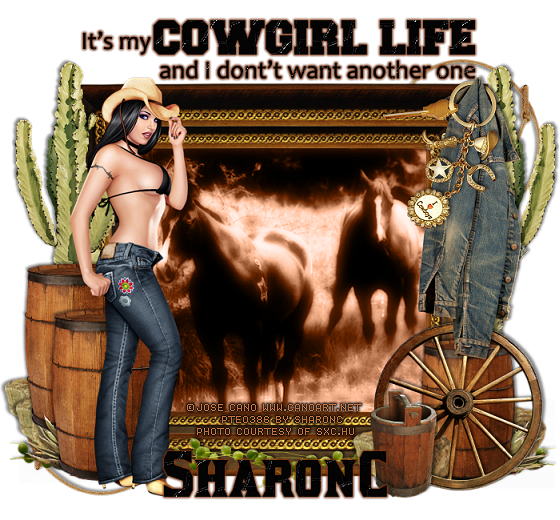
This tut was written for those with a basic knowledge of psp.
I am using the awesome artwork of VeryMany.
This is a cuties tube called Little Cowboy
This is a cuties tube called Little Cowboy
You need a license to use this art work. Please do not use without a license.
You can find this art at VeryMany store HERE
Supplies Needed
I used PSPX...but any of them should work.
PTU Scrap kit Calamity by Irish Princess Designs HERE
Drop shadow is usually V-2 H-2 Black, 50, 5, use what you prefer.
Let's get started
*Remember to add your drop shadow as you go along*
Open a new image 800 x 800 or a size you prefer, paste paper 15, apply your mask, delete, merge group.
Resize your tube to 60%, paste about center.
Paste element 80 below the tube, duplicate, mirror, duplicate again, move down some, duplicate, mirror.
Resize element 69 to 90%, paste below the tube layer.
Resize element 11 to 45%, paste on the right below the wheel element.
Resize element 91 to 40%, place on the left above the wheel element.
Resize element 76 to 40%, place by the bucket.
Resize element 100 to 30%, paste below the bucket layer on the left, duplicate a
couple of times and place one by the barrel and the other one by the bucket.
Paste element 4 on the mask layer.
Paste element 88 on the left below the barrel layer, duplicate, mirror, duplicate again and move up some on the left.
Resize element 9 to 25%, paste on the right side above the wheel element.
Resize element 57 to 75%, paste below the horses on the left.
Paste element 19, being on the top layer.
Resize element 97 to 30%, paste below the chicken layer on the left.
Resize element 46 to 50%, paste on the right below the green weed, duplicate, mirror, duplicate again, move above the wheel element by the bucket.
Paste element 29 on the right below the horse layers and up some.
Resize element 39 to 75%, paste above the horse layer on one side, duplicate, mirror.
Resize element 52 to 25%, paste on the barrel on the right.
Resize element 7 to 25%, place on the boots on the left.
Add any other elements you would like.
Open a new image 800 x 800 or a size you prefer, paste paper 15, apply your mask, delete, merge group.
Resize your tube to 60%, paste about center.
Paste element 80 below the tube, duplicate, mirror, duplicate again, move down some, duplicate, mirror.
Resize element 69 to 90%, paste below the tube layer.
Resize element 11 to 45%, paste on the right below the wheel element.
Resize element 91 to 40%, place on the left above the wheel element.
Resize element 76 to 40%, place by the bucket.
Resize element 100 to 30%, paste below the bucket layer on the left, duplicate a
couple of times and place one by the barrel and the other one by the bucket.
Paste element 4 on the mask layer.
Paste element 88 on the left below the barrel layer, duplicate, mirror, duplicate again and move up some on the left.
Resize element 9 to 25%, paste on the right side above the wheel element.
Resize element 57 to 75%, paste below the horses on the left.
Paste element 19, being on the top layer.
Resize element 97 to 30%, paste below the chicken layer on the left.
Resize element 46 to 50%, paste on the right below the green weed, duplicate, mirror, duplicate again, move above the wheel element by the bucket.
Paste element 29 on the right below the horse layers and up some.
Resize element 39 to 75%, paste above the horse layer on one side, duplicate, mirror.
Resize element 52 to 25%, paste on the barrel on the right.
Resize element 7 to 25%, place on the boots on the left.
Add any other elements you would like.
Crop your tag to be sure no stray shadows are on the edges of your tag.
Once happy with it all, close off any backgrounds, merge visible.
Resize first, then add your copyrights and name.
That's it
Hope you enjoyed doing my tut.